Recent News
Check out our 'build' page
Complete build process
It is awesome!
Our Facebook page!
Lots of updates and things to comment on!
Updated 9/18 with all kinds of new FAQs!
The Scout I Build
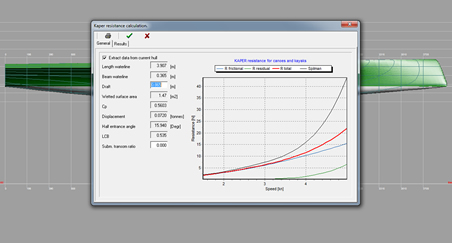 |
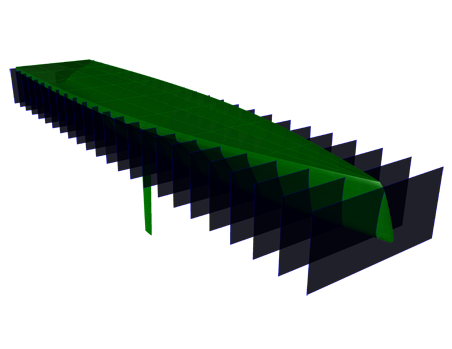
We began building the new SCOUT in April of 2012. The first thing that we had to do was to discuss what we wanted from our hull. Some of these constraints were set by the size of the solar panels and the amount of current that we'd be able to supply to the motor. Max has experience with hull design and optimization, so he used a software package to design the hull. He also found the necessary length of the keel and weight of the lead bulb that would be attached to it in order to right the boat when it flips over. The hull design that Max selected has a one meter deep keel, a 31" beam, and a 12.3' waterlength. |
||||
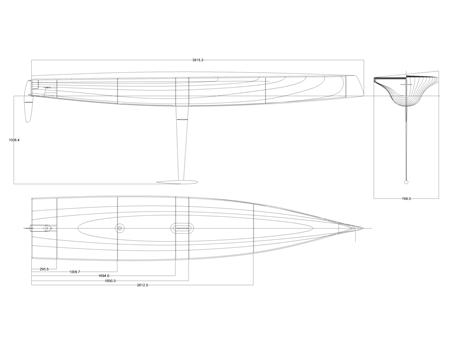 |
After Max finalized the design, he sent it to Dan. At this point in time, Dan was at Bucknell University. Dan printed the lineplan that Max sent him and began construction of the female mold that we'd use to form the foam core of the hull. We also began discussing other elements of the project such as an energy budget, motor options, and a rough schedule. |
||||
|
|||||
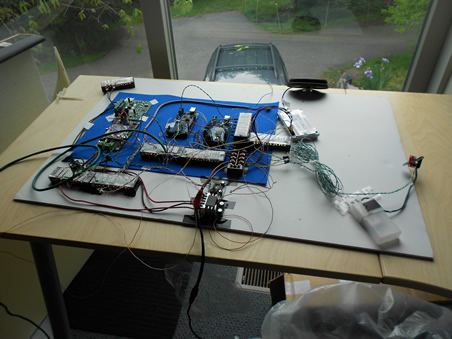 |
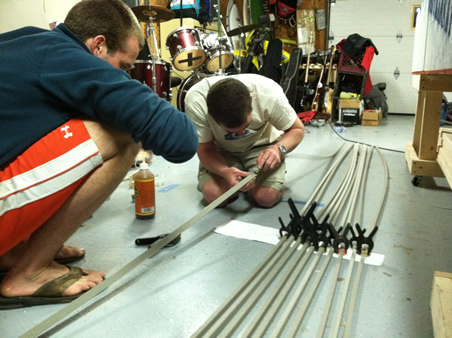
While Dan was working on this, Dylan and Matt started prototyping electronics. The basic requirements were clear, but there were many details to work out and ideas to prototype. | ||||
| The mold took Dan a few weeks to build in between classes and his other activities. | |||||
|
|||||
|
|||||
 |
At this stage of the project, things began to speed up. Matt and Dan built stands for the mold to bring it to a comfortable level. We also applied blue painting tape to the forms to ensure that they would separate from the hull once we were finished (Gorilla glue would otherwise bond the foam and the wood forms together) | ||||
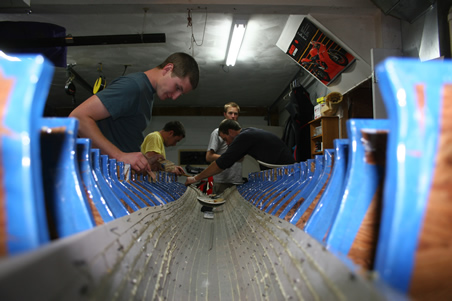 |
The first strips of foam are laid. Stripping the core ended up taking a bit longer than we anticipated, but was relatively easy work. Dan and Dylan had built a cedar kayak in a similar manner, which turned out to be valuable knowlege that we used to accelerate the process. | ||||
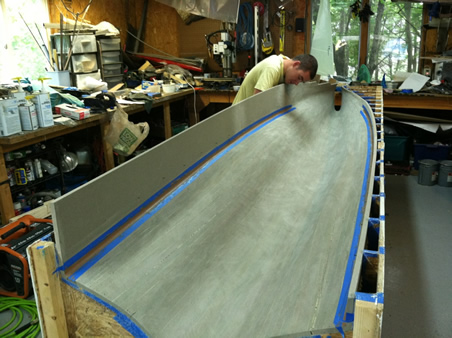 |
After the core was fully constructed, we began removing some of the excess Gorilla Glue from the inside of the hull- first with razor blades, then with sandpaper. We then pulled the hull core out of the forms. At this point, there was a large amount of excess glue that needed to be removed from the hull. The brown fillets within the taped bounds are designed to strengthen the inner skin by allowing the carbon to bond effectively to the entire surface (carbon can have a hard time bonding to perpendicular surfaces, especially without a vacuum). |
||||
 |
The bottom of the hull was next. We used razor blades and heavy sandpaper to remove the majority of the excess gorilla glue, and then began working with incrementing grades of sandpaper to fair the core material. | ||||
 |
Max replaced sections of the core in the transom with wood, for the eventual placement of components of the rudder mounting system. | ||||
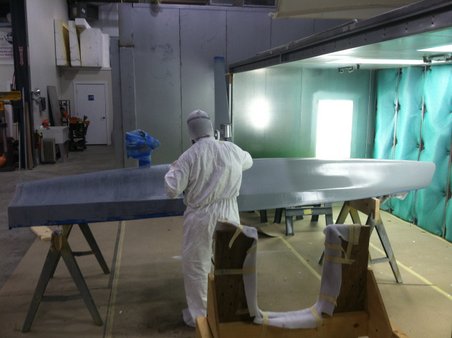
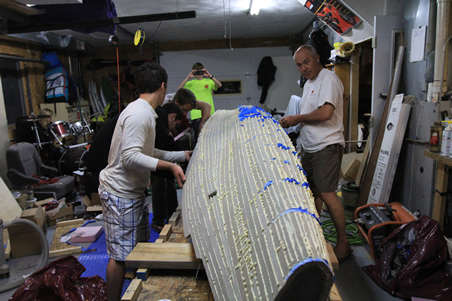
| The inside of the hull is vacuum laminated. Click here for more detailed documentation of the process. | |||||
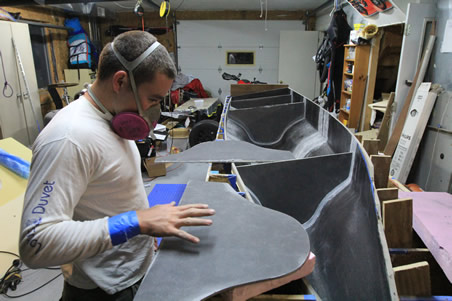 |
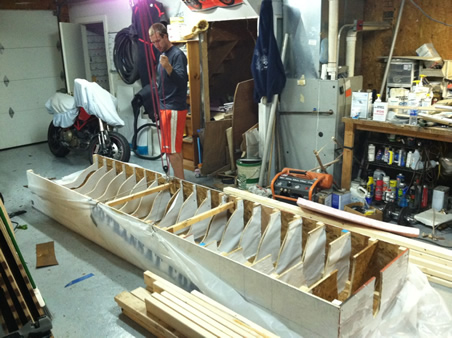
Bulkheads are installed to inprove torsional stiffness. The bulkheads are made with 5mm Corecell laminated with one ply of carbon on each side. These bulkheads are trimmed, sanded, and fit into the hull. | ||||
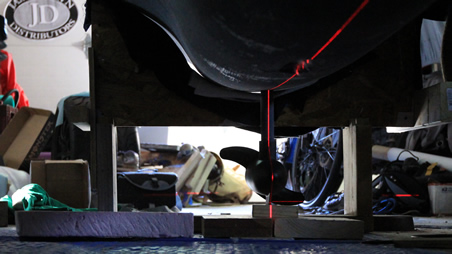 |
The motor shaft is installed. Max cut a hole in the bottom of the hull for the composite shaft to run through. We used a laser level to align the motor shaft with the hull, and mounted it to the face of bulkhead 4 with fillets under carbon tape. There are two design properties to note in this module. One is the unidirectional carbon strips running the width of the bulkhead, which adds strength in the areas where forces are primarily distributed.
|
||||
| Max faired down the Divinycell surrounding the shaft so that he could replace the carbon with fiberglass. The fiberglass insures that the forces that the motor shaft recieves are absorbed by the inner skin instead of the outer skin (the inner skin is designed to support these loads, the outer skin is not). | |||||
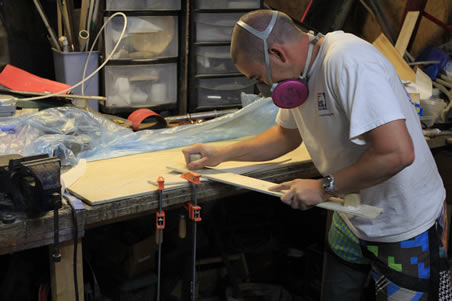 |
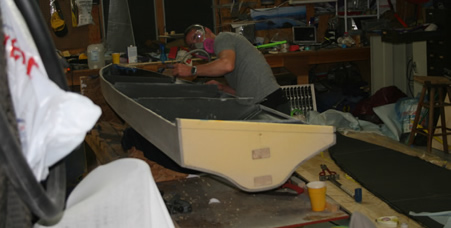
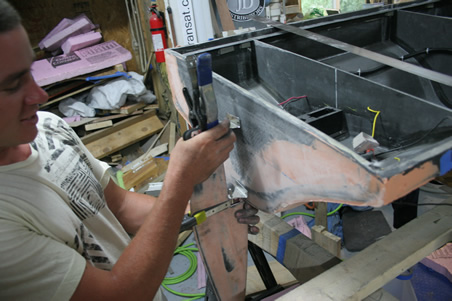
Max, Dan, and Mike move on to blade construction. Pictured here is Max shaping the rudder, which is built with a plywood core. The rudder is then vacuum bagged (once again with carbon, pealply, and breather). SP Systems sent us some fairing compound, which is the red material that you see on the rudder. Max uses this to fill any imperfections in the blade, and sands it down to a smooth finish. We'll then use Opti pintles and gudgeons to mount the rudder to the transom. | ||||
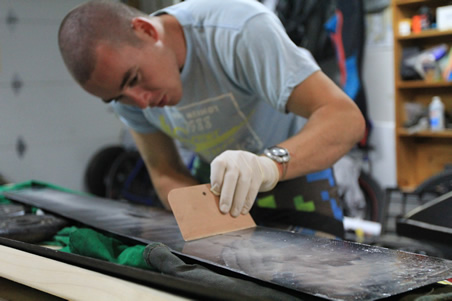 |
Max, Dan, Dylan, and Mike build the keel with 80 ply of carbon fiber. Click here for more detailed documentation of the process. When the keel comes out of the bag the next day, Matt traces a lineplan supplied by Max, and cuts down the keel to its proper size. This lets Max begin shaping the keel with a belt sander. | ||||
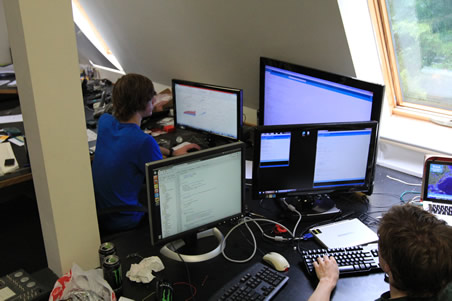 |
While everyone else is working on these components of the project, Dylan and Ryan are working on programming and electronics. Scout uses two Arduino Mega microcontrollers; one to handle navigation, and one to handle sensors and communication through our Iridium 9612 transciever. The base programming for Scout took 14 days of Ryan and Dylan programming for 15 hours a day. Something that we've learned from this project is that some things just take time; 105 hours/ week of programming was a good start. Another fun statistic is that the SCOUT crew has so far consumed roughly 80 cans of Monster energy drink and 18 cans of Redbull. | ||||
| New solar panels arrive. We needed to fatten our power budget, so we shifted our panels and managed to add an extra 30 watts worth of silicon. These panels will have their aluminum frames removed, and the panels will be laminated into the deck after it's glued to the hull. We need to wait until the deck is installed to install the panels, because the deck will flex slightly when we install it, and we need it to flex naturally, without the solar panels. | |||||
 |
Dan and Max begin installing the rudder system. The rudder is mounted to the transom with Opti pintles and gudgeons, and reinforced with carbon. | ||||
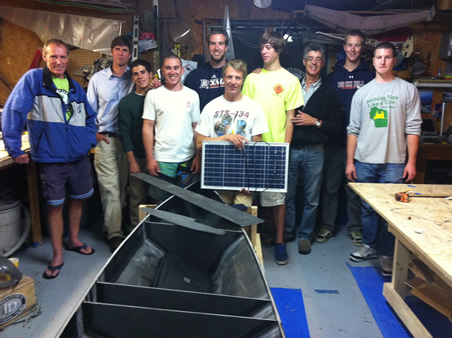 |
We had an open house to show curious neighbors and supporters what we've been working on. It was a great time; we'll surely do another soon. Around 20 people stopped by for cheese and crackers, cheap wine, and the chance to ask questions about every aspect of the project. (Photo: Geoff Prior, Mike Mills, Matt Franklin, Max Kramers, Dan Flanigan, Brendan Prior holding a solar panel [30W!], Dylan Rodriguez, Eduardo Rodriguez, Mike Flanigan, Adam Hobbins) |
||||
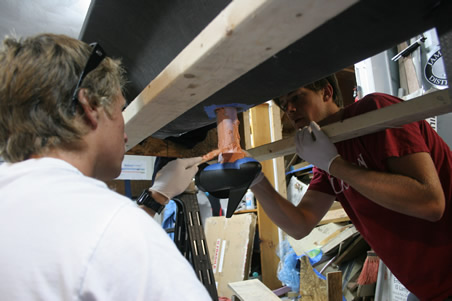 |
Brendan and Quinn apply Awl-Fair to foam pieces that Mike shaped to streamline the motor mounting shaft. The Awl-Fair will be sanded, and we'll laminate it with carbon once it's ready. | ||||
|
|||||
 |
Scout on the road to Bristol | ||||
|
|||||